Jugando con iptables
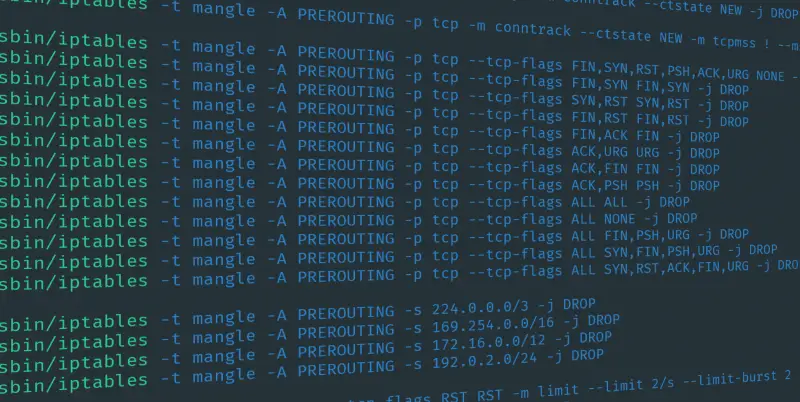
Jugando un poco con iptables
Published on April 19, 2022 by Lucho
post iptables linux networking
4 min READ
Presentacion del laboratorio
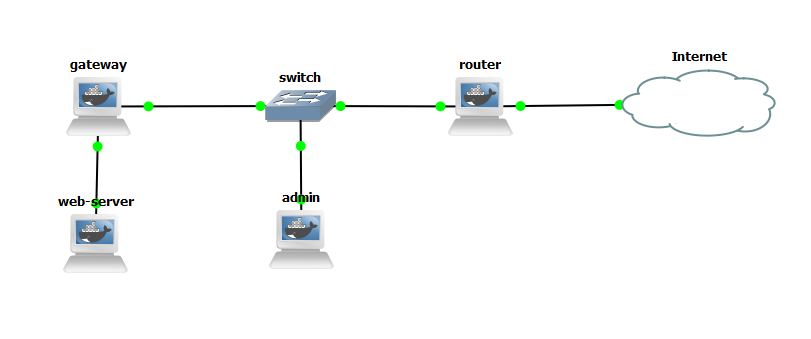
Configuracion de los nodos
---
router:
    description: "Dispositivo por el cual se enruta el trafico hacia internet"
    hostname: router
    networks:
        eth0:
            dhcp: true
        eth1:
            address: 10.15.1.1
            netmask: 255.255.255.0
---
admin:
    decription: "Nodo en cual haremos las pruebas"
    networks:
        eth0:
            address: 10.15.1.100
            netmask: 255.255.225.0
            gateway: 10.15.1.1
---
gateway:
    decription: "Nodo puerta de acceso a la red de servidores"
    networks:
        eth0:
            address: 10.15.1.10
            netmask: 255.255.225.0
            gateway: 10.15.1.1
        eth1:
            address: 192.168.0.1
            netmask: 255.255.225.0
---
web-server:
    description: "Servidor Web en una red aislada"
    networks:
        eth0:
            address: 192.168.0.10
            netmask: 255.255.225.0
            gateway: 192.168.0.1
---
Nodos
El sistema utlizado para todos los nodos es Debian 9
Router
apt update
apt install net-tools iptables bind9 -y

# Defining interfaces for gateway.
export WAN=eth0
export LAN=eth1

# IMPORTANT: Activate IP-forwarding in the kernel!
echo "1" > /proc/sys/net/ipv4/ip_forward

# Flush all the rules in nat table and filter
iptables --flush
iptables --table nat --flush

# Delete all existing chains
iptables --delete-chain
iptables --table nat --delete-chain

# Allow established connections from the public interface.
iptables -A INPUT -i $WAN -m state --state ESTABLISHED,RELATED -j ACCEPT

# Set up IP FORWARDing and Masquerading
iptables --table nat --append POSTROUTING --out-interface $WAN -j MASQUERADE
iptables --append FORWARD --in-interface $LAN -j ACCEPT

# Allow outgoing connections
iptables -A OUTPUT -j ACCEPT

# DNS Forward

cp /etc/bind/named.conf.options /etc/bind/named.conf.options.bck
vim /etc/bind/named.conf.options # Setear la config del DNS
named-checkconf /etc/bind/named.conf.options

service bind9 restart
service bind9 status
Config DNS
# Configuracion del DNS para realizar Forwards
acl nodes {
        10.15.1.0/24; // CDIR
        localhost;
};
options {
        directory "/var/cache/bind";

        recursion yes;
        allow-query { nodes; };

        forwarders {
                8.8.8.8;
                8.8.4.4;
        };
        forward only;

        dnssec-enable yes;
        dnssec-validation yes;

        auth-nxdomain no;    # conform to RFC1035
        listen-on-v6 { any; };
};
Admin
echo "nameserver 10.15.1.1" >> /etc/resolv.conf
apt update
apt install curl -y

curl http://10.15.1.10:8080
    <!DOCTYPE html>
    <html>
    <head>
    <title>Welcome to nginx!</title>
    <style>
        body {
            width: 35em;
            margin: 0 auto;
            font-family: Tahoma, Verdana, Arial, sans-serif;
        }
    </style>
    </head>
    <body>
    <h1>Welcome to nginx!</h1>
    <p>If you see this page, the nginx web server is successfully installed and
    working. Further configuration is required.</p>

    <p>For online documentation and support please refer to
    <a href="http://nginx.org/">nginx.org</a>.<br/>
    Commercial support is available at
    <a href="http://nginx.com/">nginx.com</a>.</p>

    <p><em>Thank you for using nginx.</em></p>
    </body>
    </html>
Gateway
echo "nameserver 10.15.1.1" >> /etc/resolv.conf
apt update
apt install iptables -y

# Hosts
export router="10.15.1.1"
export webserver="192.168.0.10"

# Forward
echo "1" > /proc/sys/net/ipv4/ip_forward

# DNS TCP/UDP
iptables -t nat -A PREROUTING -p tcp --dport 53 -j DNAT --to-destination $router:53
iptables -t nat -A PREROUTING -p udp --dport 53 -j DNAT --to-destination $router:53

# Web Server
iptables -t nat -A PREROUTING -p tcp --dport 8080 -j DNAT --to-destination $webserver:80
iptables -t nat -A POSTROUTING -j MASQUERADE
Web-Server
echo "nameserver 192.168.0.1" >> /etc/resolv.conf
apt update
apt install curl nginx -y
service nginx start

curl http://localhost

    <!DOCTYPE html>
    <html>
    <head>
    <title>Welcome to nginx!</title>
    <style>
        body {
            width: 35em;
            margin: 0 auto;
            font-family: Tahoma, Verdana, Arial, sans-serif;
        }
    </style>
    </head>
    <body>
    <h1>Welcome to nginx!</h1>
    <p>If you see this page, the nginx web server is successfully installed and
    working. Further configuration is required.</p>

    <p>For online documentation and support please refer to
    <a href="http://nginx.org/">nginx.org</a>.<br/>
    Commercial support is available at
    <a href="http://nginx.com/">nginx.com</a>.</p>

    <p><em>Thank you for using nginx.</em></p>
    </body>
    </html>
Continuara..